Adobe Analytics Mobile Device Mode
Detailed technical documentation on the mobile device mode settings for Adobe Analytics destination.
This document covers the necessary settings and configurations to send events to Adobe Analytics via your mobile device mode.
To configure Adobe Analytics via the mobile device mode, follow these steps:
- Click on the Manage Apps option on the left nav bar on your Adobe Mobile Services dashboard.
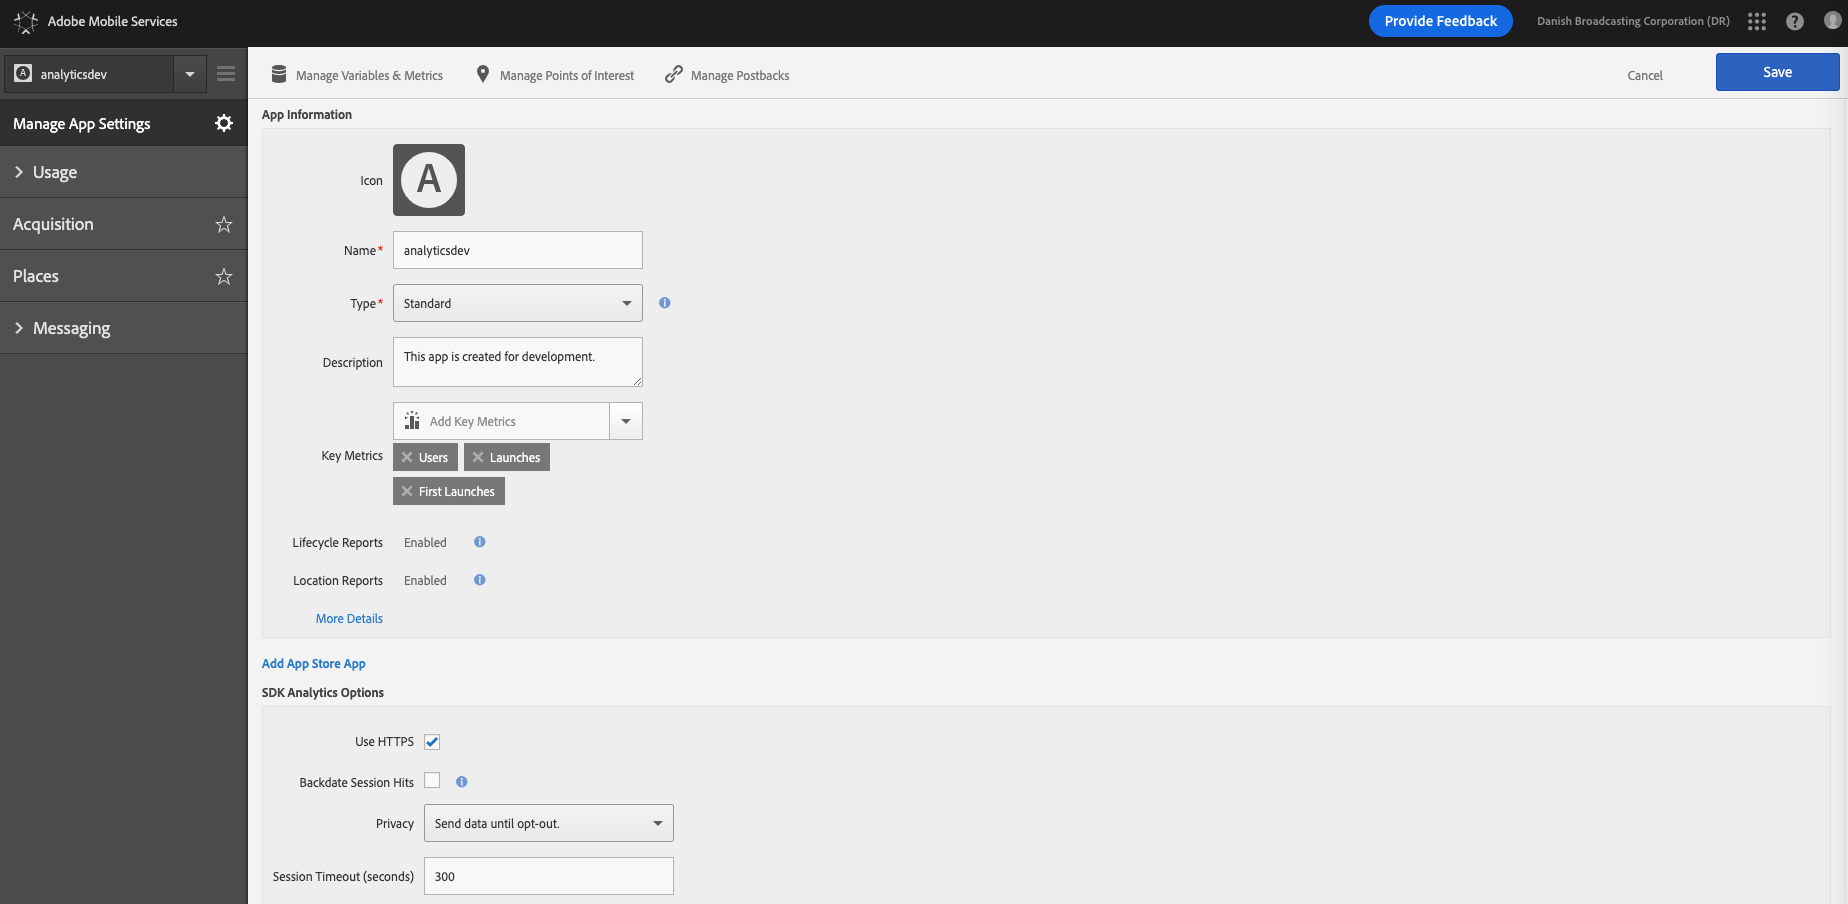
- Add your app or click on an existing app and configure the required settings under the Manage App Settings tab, as shown:

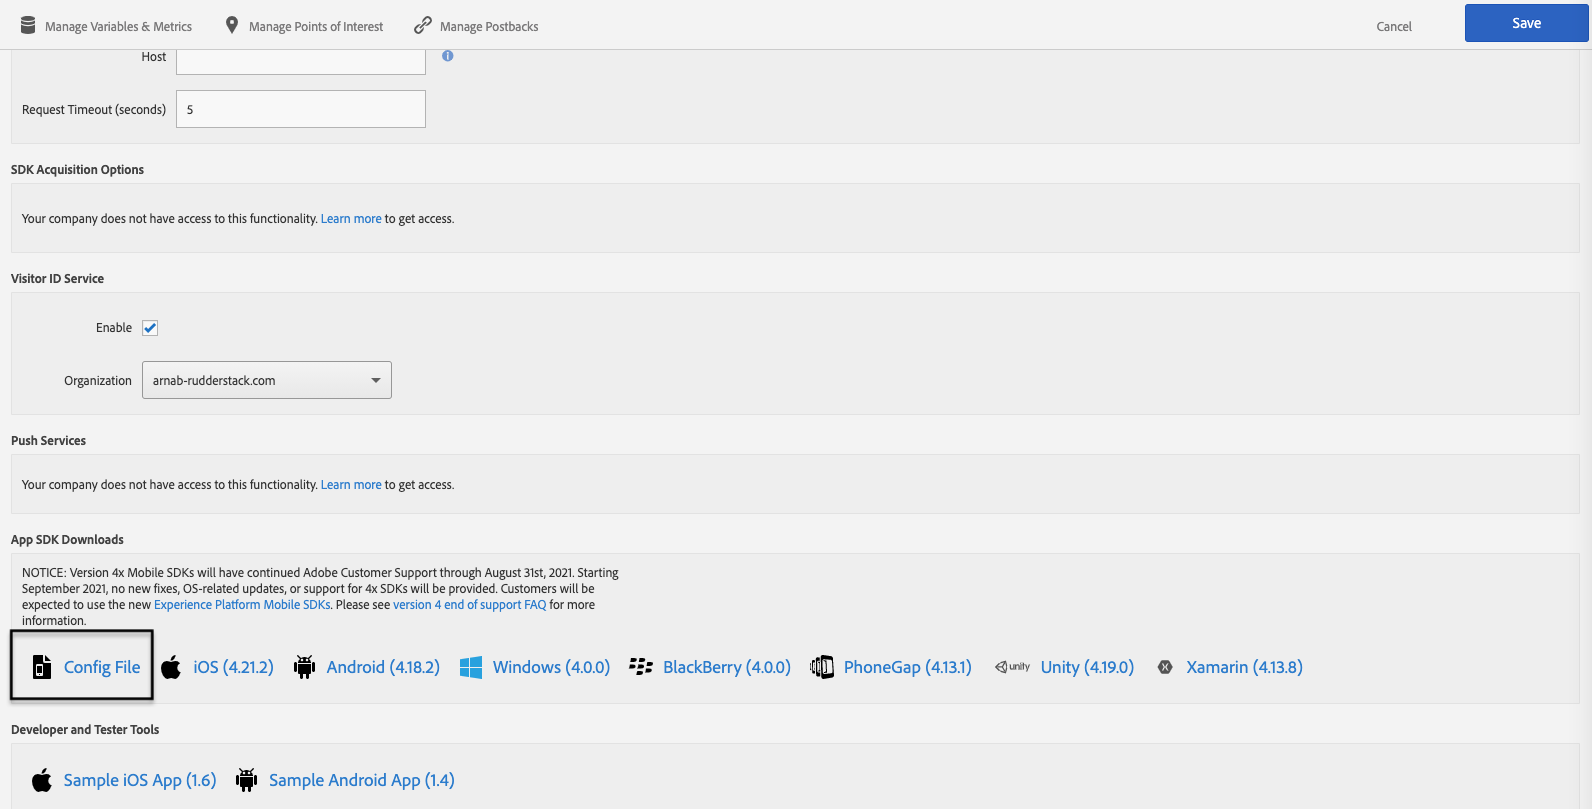
- Click on the Config File option present at the bottom of the same page, as shown:

Android
For Android, place the ADBMobileConfig.json file inside your app under src/main/assets/.
Then, follow the instructions in the Adobe documentation to create the report suite.
iOS
For iOS, drag and drop the ADBMobileConfig.json under the Pods section in the Project Navigatorand verify the following:
- The
Copy items if neededcheckbox is selected. Create groupsis selected.- None of the checkboxes in the
Add to targetssection is selected.
In the File Inspector, add the JSON file to the AdobeMobileSDK target.
Then, follow the instructions in the Adobe documentation to create the report suite.
Adding Device Mode Integration
- In your
Podfile, add theRudder-Adobeextension:pod 'Rudder-Adobe' - After adding the dependency followed by
pod install, add the imports to yourAppDelegate.mfile as shown:#import <Rudder/Rudder.h>#import <RudderAdobeFactory.h> - Then, add the initialization of your
RSClientas shown:RSConfigBuilder *configBuilder = [[RSConfigBuilder alloc] init];[configBuilder withDataPlaneUrl:DATA_PLANE_URL];[configBuilder withFactory:[RudderAdobeFactory instance]];[RSClient getInstance:<YOUR_WRITE_KEY> config:[configBuilder build]];
- Open your
app/build.gradlefile and add the following under thedependenciessection :implementation 'com.rudderstack.android.sdk:core:1.+'implementation 'com.google.code.gson:gson:2.8.6'implementation 'com.rudderstack.android.integration:adobe:1.0.0'// Adobe Analyticsimplementation 'com.adobe.mobile:adobeMobileLibrary:4.18.2' - Initialize the RudderStack SDK in the
Applicationclass'onCreate()method as shown:// initializing Rudder SDKval rudderClient = RudderClient.getInstance(this,WRITE_KEY,RudderConfig.Builder().withDataPlaneUrl(DATA_PLANE_URL).withFactory(AdobeIntegrationFactory.FACTORY).build()) - For Android, make sure you add these permissions to your
AndroidManifest.xml:<uses-permission android:name="android.permission.INTERNET" /><uses-permission android:name="android.permission.ACCESS_NETWORK_STATE" />
Dashboard Settings to Send Events via the Mobile Device Mode
Configure the following settings in the RudderStack dashboard to use the mobile device mode:
- Set the Heartbeat Tracking Server URL and it should be in the format of
[your_namespace].hb.omtrdc.net. - Toggle Check for Heartbeat calls to be made over HTTPS to enable or disable the SSL mode.
- Enter Prefix to add before all contextData property to append a prefix before a custom property.
- Select Product Identifier to look for
Product Id. By default, it is set toProduct Name.
Sending Events
Map all the events defined in the Adobe Mobile Services dashboard in the Map Rudder Events to Adobe Custom Events setting in the RudderStack dashboard.
Sending Custom Properties
Map all the properties defined at the Adobe Mobile Services dashboard in the Map Rudder Context data to Adobe Context Data settings in the Rudderstack dashboard.
Identify
When you make an identify call, RudderStack sets the Adobe visitorId to the value of the user’s RudderStack userId.
A sample identify call looks like the following:
[[RSClient sharedInstance] identify:@"Adobe_iOS_user"];MainApplication.rudderClient.identify("AdobeUser");Track
When you make a track call, RudderStack sends an Adobe trackAction event and passes your event name and any associated properties mapped to Adobe as context data values.
A sample track call is as shown:
[[RSClient sharedInstance] track:@"Order Completed" properties:@{ @"orderId" : @2002, @"category" : @"Cloths", @"productId" : @"2200013", @"name": @"Shirt", @"price" : @10001, @"quantity" : @12}];MainApplication.rudderClient.track("Order Completed", RudderProperty() .putValue("orderId", "12345") .putValue("category", "category") .putValue("revenue", 99.9) .putValue("shipping", 13.99) .putValue("tax", 20.99) .putValue("promotion_id", "PROMO_1234") );Screen
When you make a screen call, RudderStack sends an Adobe trackState event and passes the screen name along with any associated properties mapped to Adobe as context data values.
A sample screen call looks like the following:
[[RSClient sharedInstance] track:@"Home Screen" properties:@{ @"Width" : @"13" }];MainApplication.rudderClient.screen("Home Screen", RudderProperty() .putValue("Width",12) )Reset
Calling reset sets the user’s Adobe visitorId to null.
visitorId is null until you explicitly set it (by calling identify).A sample reset call is as shown:
[[RSClient sharedInstance] reset];MainApplication.rudderClient.reset()Flush
Calling the flush method immediately sends all the locally queued events to Adobe.
A sample flush call is as follows:
MainApplication.rudderClient.flush()flush call is supported only in Android.Contact us
For more information on the topics covered on this page, email us or start a conversation in our Slack community.