Braze is a customer engagement platform that helps you better understand your customers' in-app behavior and use the insights to improve your users' app experience.
RudderStack supports Braze as a destination where you can seamlessly send your event data.
Getting started
Before configuring Braze as a destination in RudderStack, verify if the source platform is supported by Braze by referring to the table below:
| Connection Mode | Web | Mobile | Server |
|---|---|---|---|
| Device mode | Supported | Supported | - |
| Cloud mode | Supported | Supported | Supported |
Once you have confirmed that the source platform supports sending events to Braze, follow these steps:
- From your RudderStack dashboard, add a source. Then, from the list of destinations, select Braze.
- Assign a name to the destination and click on Continue.
Connection settings
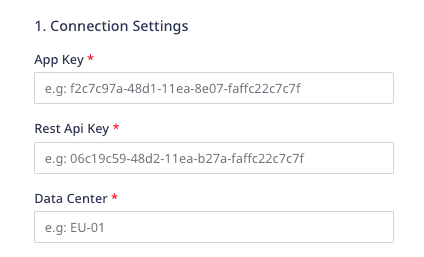
To successfully configure Braze as a destination, you need to configure the following settings:

- App Key: Enter your Braze app key.
- REST API Key: Enter the REST API key associated with your project.
- Data Center: Specify the data center associated with your Braze account. The easiest way to get your data center details is to log into your Braze account and observing your URL. Some examples are shown below:
| URL | Data Center instance |
|---|---|
| https://dashboard-01.braze.com | US-01 |
| https://dashboard-03.braze.com | US-03 |
| https://dashboard-01.braze.eu | EU-01 |
- Track events for anonymous users: Enable this setting to track anonymous users.
- Client-side Events Filtering: This setting lets you specify which events should be blocked or allowed to flow through to Braze.
- Use device mode to send events: Enable this setting to send events to Braze via the device mode.
- OneTrust Cookie Categories: This setting lets you associate the OneTrust cookie consent groups to Braze.
Adding device mode integration
Depending on your platform of integration, follow the steps below to add Braze to your project:
- Open the
Podfileof your project and add the following line:pod 'Rudder-Braze' - Run the
pod installcommand. - Finally, change the SDK initialization to the following snippet:RudderConfigBuilder *builder = [[RudderConfigBuilder alloc] init];[builder withDataPlaneUrl:<DATA_PLANE_URL>];[builder withFactory:[RudderBrazeFactory instance]];[RudderClient getInstance:<WRITE_KEY>; config:[builder build]];
- Open your
app/build.gradle(Module: app) file, and add the following:repositories {mavenCentral()maven { url "https://appboy.github.io/appboy-android-sdk/sdk" }} - Add the following under
dependenciessection:implementation 'com.rudderstack.android.sdk:core:[1.0,2.0)'implementation 'com.rudderstack.android.integration:braze:[1.0.7,)'implementation 'com.google.code.gson:gson:2.8.9' - Add the following permissions to the
AndroidManifest.xmlfile:<uses-permission android:name="android.permission.INTERNET" /><uses-permission android:name="android.permission.ACCESS_NETWORK_STATE" /> - Finally, change the SDK initialization to the following:val rudderClient: RudderClient = RudderClient.getInstance(this,<WRITE_KEY>,RudderConfig.Builder().withDataPlaneUrl(<DATA_PLANE_URL>).withLogLevel(RudderLogger.RudderLogLevel.DEBUG).withFactory(BrazeIntegrationFactory.FACTORY).build())
- Add the RudderStack-Braze module to your app by running the following command:npm install @rudderstack/rudder-integration-braze-react-nativeyarn add @rudderstack/rudder-integration-braze-react-native
- Open your
android/build.gradlefile (Project level), and add the following:repositories {maven { url "https://appboy.github.io/appboy-android-sdk/sdk" }} - Import the module you added above and add it to your SDK initialization code as shown:import rudderClient from "@rudderstack/rudder-sdk-react-native"import braze from "@rudderstack/rudder-integration-braze-react-native"const config = {dataPlaneUrl: DATA_PLANE_URL,trackAppLifecycleEvents: true,withFactories: [braze],}rudderClient.setup(WRITE_KEY, config)
- Add the following dependency to the
dependenciessection of yourpubspec.yamlfile.rudder_integration_braze_flutter: ^1.0.1 - Run the below command to install the dependency added in the above step:flutter pub get
- Import the
RudderIntegrationBrazeFlutterin your application where you are initializing the SDK.import 'package:rudder_integration_braze_flutter/rudder_integration_braze_flutter.dart'; - Finally, change the initialization of your
RudderClientas shown:final RudderController rudderClient = RudderController.instance;RudderConfigBuilder builder = RudderConfigBuilder();builder.withFactory(RudderIntegrationBrazeFlutter());rudderClient.initialize(<WRITE_KEY>, config: builder.build(), options: null);
Identify
You can use the identify call to identify a user in Braze in any of the following cases:
- When the user registers to the app for the first time.
- When they log into their app.
- When they update their information.
A sample identify call is shown below:
rudderanalytics.identify( "1hKOmRA4GRlm", { email: "alex@example.com", name: "Alex Keener" });Deleting a user
You can delete a user in Braze using the Suppression with Delete regulation of the RudderStack Data Regulation API.
userId or any custom identifier in the event.A sample regulation request body for deleting a user in Braze is shown below:
{ "regulationType": "suppress_with_delete", "destinationIds": [ "2FIKkByqn37FhzczP23eZmURciA" ], "users": [{ "userId": "1hKOmRA4GRlm", "<customKey>": "<customValue>" }]}Track
The track call lets you record the customer events, that is, the actions that they perform, along with any properties associated with them.
A sample track call is shown below:
rudderanalytics.track("Product Added", { numberOfRatings: "12", name: "item 1",});Order Completed
When you call the track method for an Order Completed event, RudderStack sends the product information present in the event to Braze as purchases.
A sample Order Completed event is shown below:
rudderanalytics.track("Order Completed", { userId: "1hKOmRA4GRlm", currency: "USD", products: [{ product_id: "123454387", name: "Game", price: 15.99 } ],});Page
The page call allows you to record your website's page views, with the additional relevant information about the viewed page.
A samplepage call is as shown below:
rudderanalytics.page("Cart", "Cart Viewed", { path: "/cart", referrer: "test.com", search: "term", title: "test_item", url: "http://test.in",})Group
You can use the group call to link an identified user with a group, such as a company, organization, or an account.
rudderanalytics.group("12345", { name: "MyGroup", industry: "IT", employees: 450, plan: "basic"})Once you send a group event, RudderStack sends a custom attribute to Braze with the name as ab_rudder_group_<groupId> and the value as true. For example, if the groupId is 123456, then RudderStack creates a custom attribute with the name ab_rudder_group_123456 and sends it to Braze with its value to true.
FAQ
Where can I find the Braze App Key and REST API Key?
To obtain your Braze App Key and REST API Key, follow these steps:
- Log into your Braze dashboard.
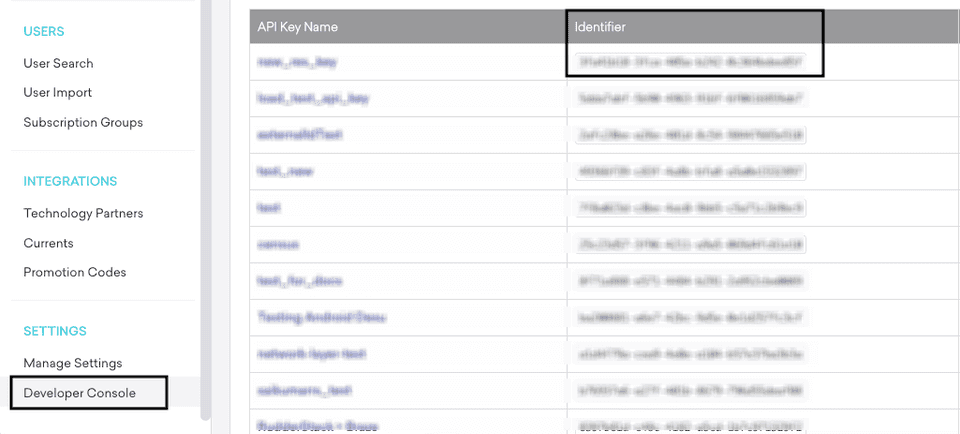
- Go to Settings > Developer Console.
- You can find the REST API key for your app under the Identifier column, as shown:

- You can find your Braze App Key in the Identification section, as shown:

Contact us
For more information on the topics covered on this page, email us or start a conversation in our Slack community.