SnapEngage is an enterprise chat platform. It offers chatbots and live chat integrations to drive conversions, reduce response times, and increase customer satisfaction.
RudderStack supports SnapEngage as a destination where you can seamlessly send your event data.
Getting started
Before configuring SnapEngage as a destination in RudderStack, verify if the source platform is supported by SnapEngage by referring to the table below:
| Connection Mode | Web | Mobile | Server |
|---|---|---|---|
| Device mode | Supported | - | - |
| Cloud mode | - | - | - |
Once you have confirmed that the source platform supports sending events to SnapEngage, follow these steps:
- From your RudderStack dashboard, add a source. Then, from the list of destinations, select SnapEngage.
- Assign a name to the destination and click on Continue.
Connection settings
To successfully configure SnapEngage as a destination, you will need to configure the following settings:


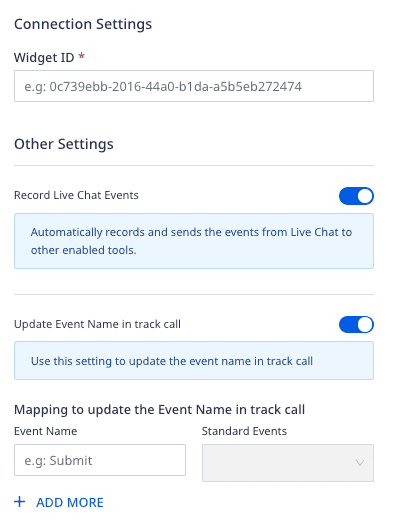
- Widget ID: Enter your SnapEngage widget ID.
- Record Live Chat Events: Enable this setting to allow RudderStack to automatically record your SnapEngage Live Chat events as
trackevents. - Update Event Name in track call: If Record Live Chat Events is enabled, enable this setting to update the event names in the
trackcall.- Mapping to update the Event Name in track call: Use this setting to map the standard SnapEngage events with your custom event names.
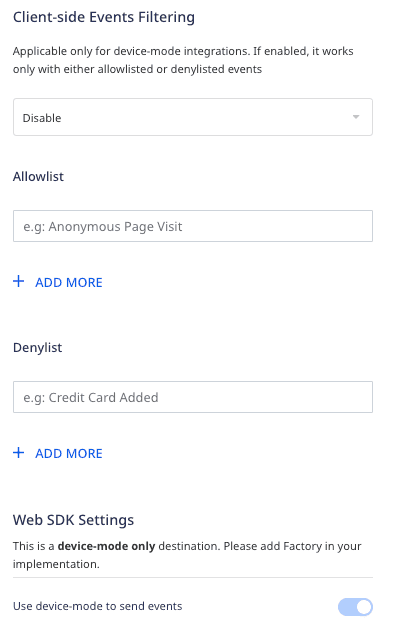
- Client-side Events Filtering: This setting lets you specify which events should be blocked or allowed to flow through to SnapEngage.
- Use device mode to send events: As this is a web device mode-only destination, this setting is enabled by default and cannot be disabled.
Identify
You can use the identify call to set the user's email and username in SnapEngage through their SDK.
A sample identify call is shown below:
rudderanalytics.identify( "1hKOmRA4GRlm", { email: "alex@example.com", name: "Alex Keener" });Supported mappings
The following table lists the mappings between the RudderStack and SnapEngage properties:
| RudderStack property | SnapEngage property | Data type | Presence |
|---|---|---|---|
traits.email / context.traits.email | email | String | Required |
traits.name / context.traits.name | name | String | Optional |
Track
If you enable the Record Live Chat Events dashboard setting, RudderStack records the SnapEngage Live Chat events based on the user's interactions and sends them as track events. You can then view and analyze these events using other tools (connected to the same source in RudderStack).
Supported events
RudderStack automatically records and sends the following Live Chat events:
SnapEngage.setCallback("StartChat", function() { window.rudderanalytics.track( "Live Chat Conversation Started", {}, { context: { integration: { name: 'snapengage', version: '1.0.0' } } } );});SnapEngage.setCallback("Close", function() { window.rudderanalytics.track( "Live Chat Conversation Ended", {}, { context: { integration: { name: 'snapengage', version: '1.0.0' } } } );});SnapEngage.setCallback("ChatMessageSent", function() { window.rudderanalytics.track( "Live Chat Message Sent", {}, { context: { integration: { name: 'snapengage', version: '1.0.0' } } } );});SnapEngage.setCallback("ChatMessageReceived", function(agent) { window.rudderanalytics.track( "Live Chat Message Received", { agentUsername: agent }, { context: { integration: { name: 'snapengage', version: '1.0.0' } } } );});SnapEngage.setCallback("InlineButtonClicked", function() { window.rudderanalytics.track( "Inline Button Clicked", {}, { context: { integration: { name: 'snapengage', version: '1.0.0' } } } );});Mapping events
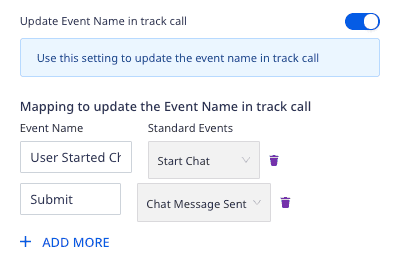
You can also update the standard SnapEngage Live Chat events with custom event names. Enable the Update Event Name in track call dashboard setting in RudderStack and specify the required mapping, as shown:

From the mappings set in the above image, RudderStack replaces the event names "Live Chat Conversation Started" and "Live Chat Message Sent"with "User Started Chat" and "Submit" respectively.
FAQ
Where can I find the SnapEngage widget ID?
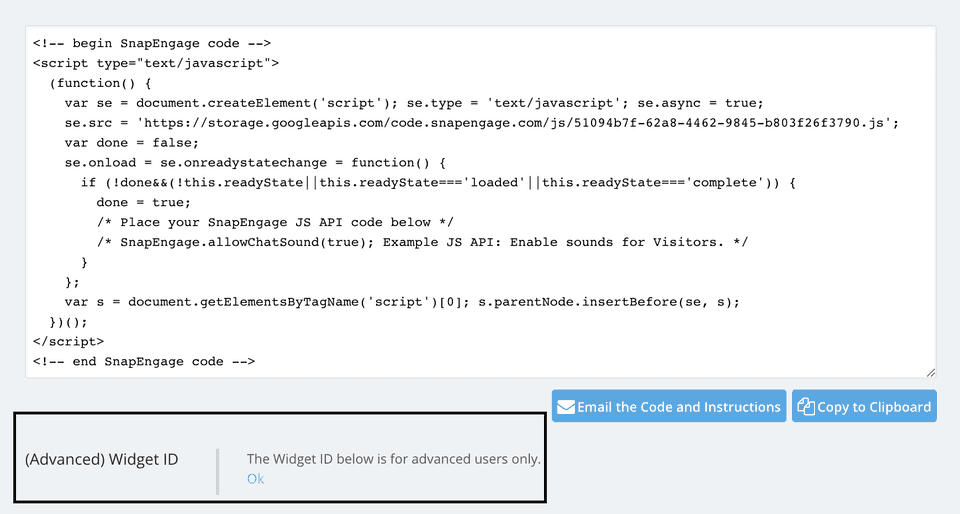
To get your SnapEngage widget ID, follow these steps:
- Log into your SnapEngage dashboard.
- In the sidebar, select the widget under Current Widget for which you want the widget ID.
- Go to Settings > Get the Code. You will find the widget ID under (Advanced) Widget ID, as shown:

Contact us
For more information on the topics covered on this page, email us or start a conversation in our Slack community.