SendGrid is an email delivery and marketing tool that lets you build and deliver personalized experiences through their API and marketing automation flows.
This document guides you in setting up SendGrid as a source in RudderStack. Once configured, RudderStack automatically ingests your SendGrid data and routes it to your specified data warehouse destination.
Getting started
To set up SendGrid as a source in RudderStack, follow these steps:
- Log into your RudderStack dashboard.
- Go to Sources > New source > Cloud Extract and select SendGrid V2 from the list of sources.
- Assign a name to your source and click on Next.
Connection settings
- Enter the following connection credentials to authenticate your SendGrid account with RudderStack:
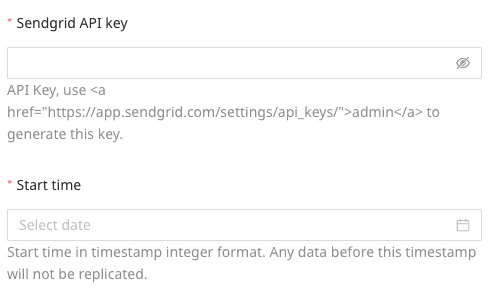
- SendGrid API key: Enter your SendGrid API key by going to your SendGrid dashboard and navigating to Settings > API Keys.
- Start time: Choose the start date from which you want RudderStack to ingest the SendGrid data. RudderStack will not replicate any data before this date.
Destination settings
The following settings specify how RudderStack sends the data ingested from SendGrid to the connected warehouse destination:
- Table prefix: RudderStack uses this prefix to create a table in your data warehouse and loads all your SendGrid data into it.
- Schedule Settings: RudderStack gives you three options to ingest the data from SendGrid:
- Basic: Runs the syncs at the specified time interval.
- CRON: Runs the syncs based on the user-defined CRON expression.
- Manual: You are required to run the syncs manually.
Selecting the data to import
You can choose the SendGrid data you want to ingest by selecting the required resources:
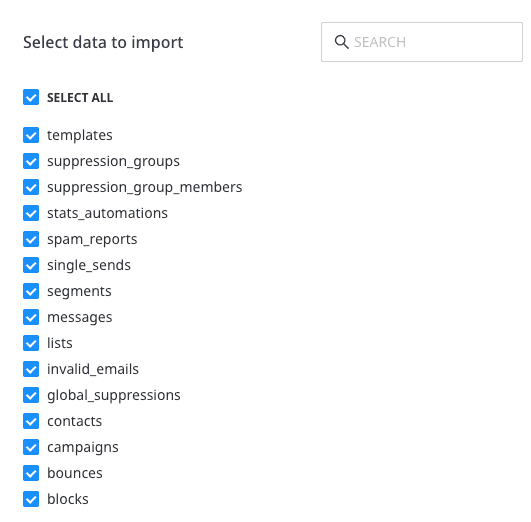
The below table mentions the syncs and API endpoints supported by these resources from SendGrid to your warehouse destination:
| Resource | Full Refresh sync | Incremental sync | SendGrid API endpoint |
|---|---|---|---|
blocks | Yes | Yes | /suppression/blocks |
bounces | Yes | Yes | /suppression/bounces |
campaigns | Yes | No | /marketing/campaigns |
contacts | Yes | No | /marketing/contacts |
global_suppressions | Yes | Yes | /suppression/unsubscribes |
invalid_emails | Yes | Yes | /suppression/invalid_emails |
lists | Yes | No | /marketing/lists |
messages | Yes | Yes | /messages |
segments | Yes | No | /marketing/segments |
single_sends | Yes | No | /marketing/stats/singlesends |
spam_reports | Yes | Yes | /suppression/spam_reports |
stats_automations | Yes | No | /marketing/stats/automations |
suppression_group_members | Yes | No | /asm/suppressions |
suppression_groups | Yes | No | /asm/groups |
templates | Yes | No | /templates |
Note the following restrictions for the campaigns, messages, and single_sends resources:
campaigns: SendGrid currently supports two kinds of marketing campaigns - legacy and new marketing campaigns. However, RudderStack only supports the new marketing campaigns.
messages: To ingest data from this resource, you must have purchased access to the Email Activity Feed API. For more information, refer to the SendGrid API documentation.single_sends: RudderStack uses thestatsAPI instead of themarketingAPI to ingest the data from this resource.
SendGrid is now configured as a source. RudderStack will start ingesting data from SendGrid as per your specified schedule and frequency.
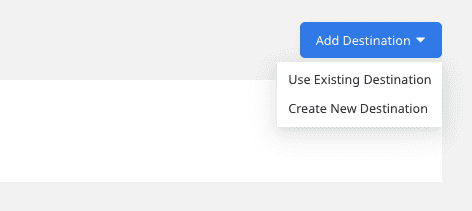
You can further connect this source to your data warehouse by clicking on Add Destination, as shown:
FAQ
How do I obtain the SendGrid API key?
To obtain the API key for configuring the SendGrid Cloud Extract source, follow these steps:
- Log into your SendGrid dashboard.
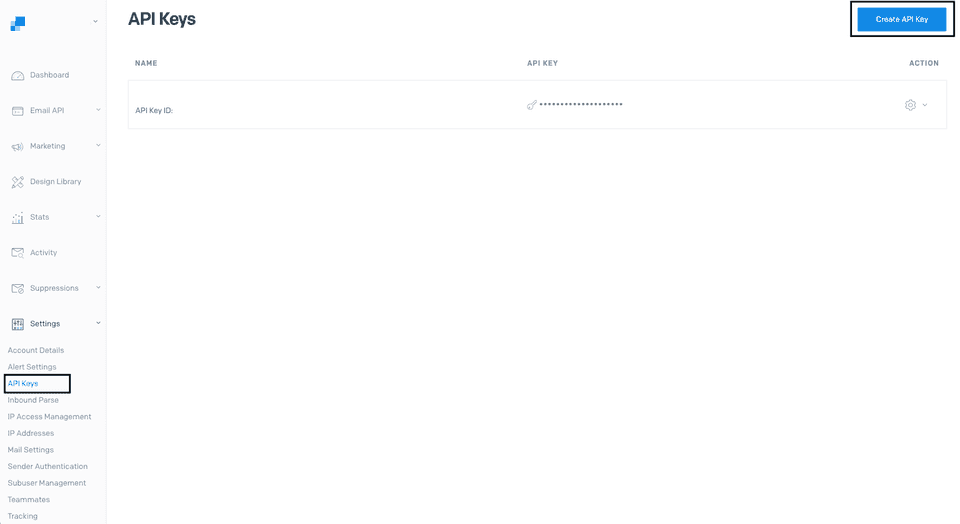
- Go to Settings > API keys.
- Click on the Create API key option, as shown:
- Enter the name of the API key under the API Key Name field. In API Key Permissions, select Restricted Access.
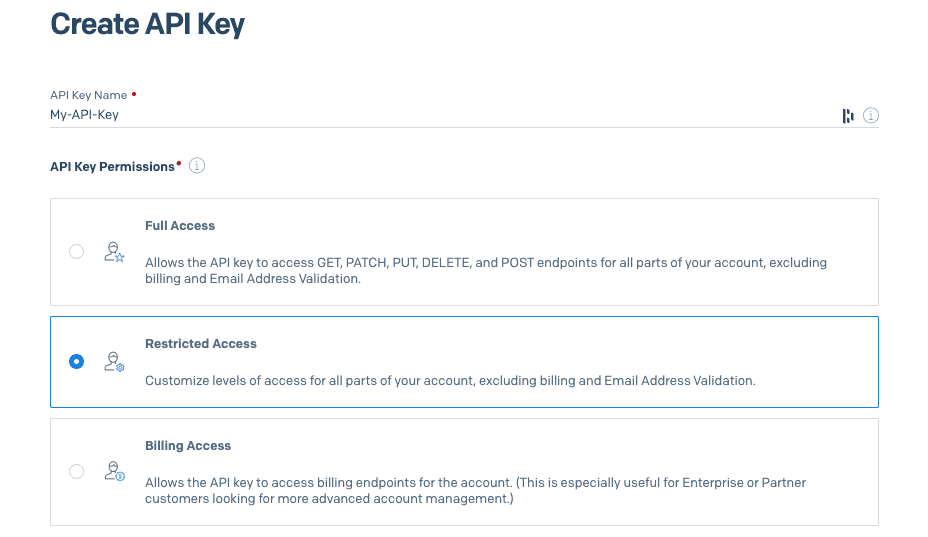
- Set the permissions as shown below:
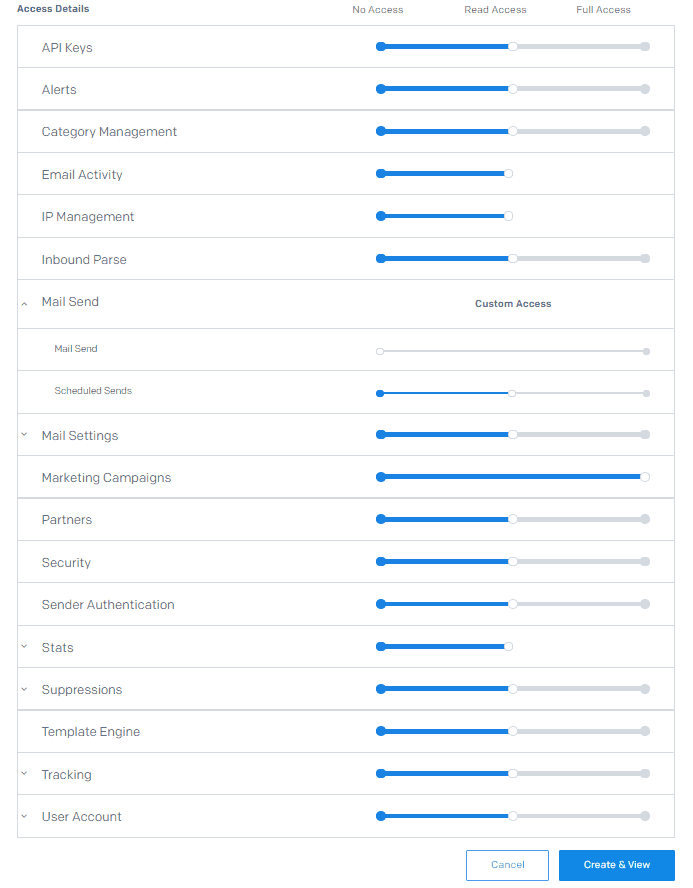
- Finally, click on Create & View. Use these credentials to configure the source.
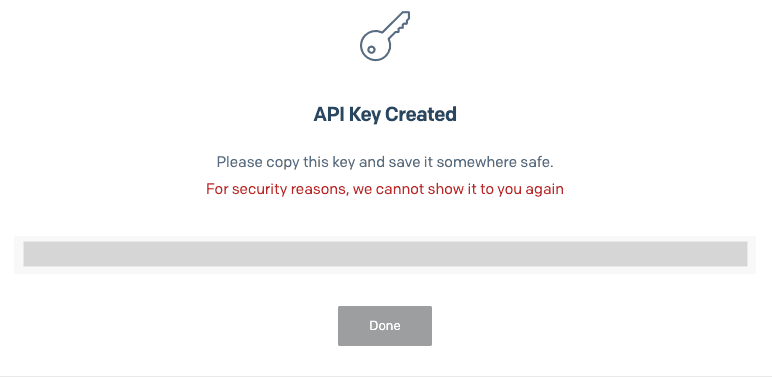
Copy the API key and store it securely. SendGrid will not display the API key again once you click on Done.
How does RudderStack sync the SendGrid data?
Upon configuring the source, RudderStack first connects to your SendGrid instance and pulls all the historical data. Subsequently, RudderStack syncs the SendGrid data based on your specified sync schedule and frequency.
Is it possible to have multiple Cloud Extract sources writing to the same schema?
Yes, it is.
RudderStack associates a table prefix for every Cloud Extract source writing to a warehouse schema. This way, multiple Cloud Extract sources can write to the same schema with different table prefixes.
Contact us
For more information on the topics covered on this page, email us or start a conversation in our Slack community.