Setting Up Drip in RudderStack
Step-by-step guide on sending your event data from RudderStack to Drip.
To enable sending data to Drip, you will first need to add it as a destination in RudderStack. Once the destination is configured and enabled, events from RudderStack will start flowing to Drip.
Before configuring Drip as a destination, verify if Drip supports the source platform by referring to the table below:
| Connection Mode | Web | Mobile | Server |
|---|---|---|---|
| Device mode | Supported | - | - |
| Cloud mode | Supported | Supported | Supported |
Once you have confirmed that the source supports sending events to Drip, follow these steps:
- From your RudderStack dashboard, add the source. From the list of destinations, select Drip.
- Give a name to the destination and click on Next. You should then see the following screen:
.png) Connection Settings for Drip
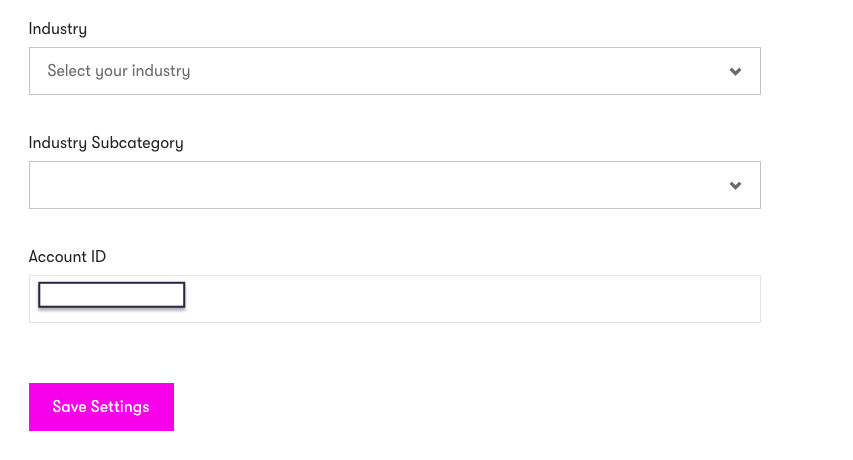
Connection Settings for Drip- Next, enter your Drip Account ID. To get your Account ID, sign in to your Drip dashboard and go to Settings - Account. Scroll down to see your Account ID.

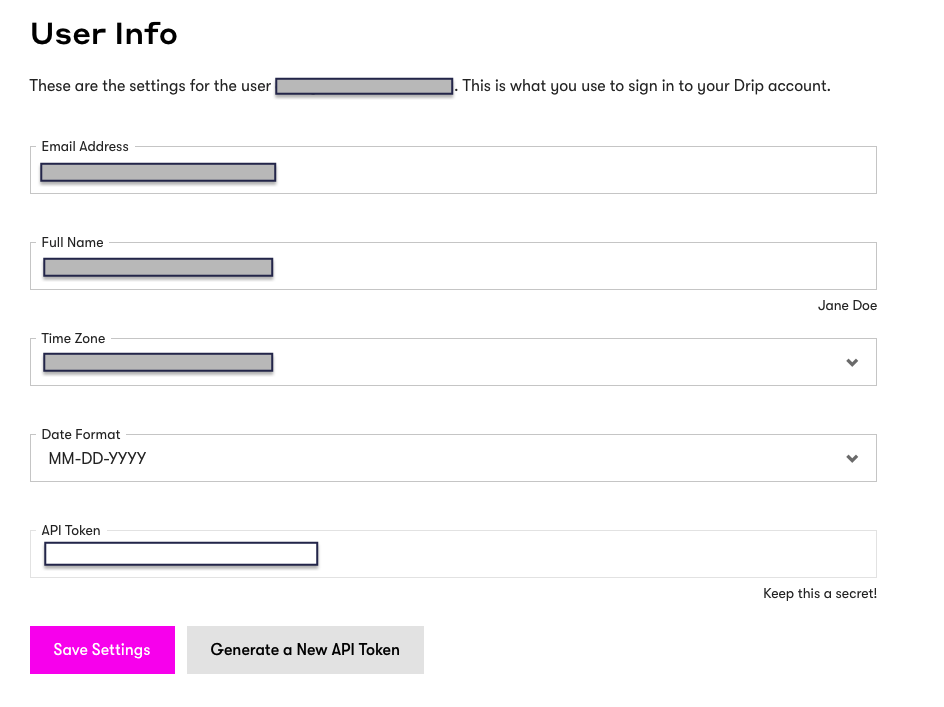
- Enter your Drip API Token. To get your Drip API token, go to Settings - User Settings in your Drip dashboard.

- Enter your Campaign ID. To get your campaign ID, go to Campaigns - Email Series and choose the relevant campaign. The last part of the URL is the campaign ID, e.g.
https://www.getdrip.com/account_id/campaigns/campaign_id.
identify call, which takes a higher precedence.- User Creation Mode This option lets you create the user with their
emailusing thetrackcall, if the user doesn't already exist. - Use device-mode to send events: Enable this option to send events via the web device mode.
- Finally, click on Next. That's it! Drip will now be enabled as a destination in Rudderstack.
Contact us
For more information on the topics covered on this page, email us or start a conversation in our Slack community.